Difference between revisions of "New Deployment Pipeline"
m (Protected "New Deployment Pipeline" ([Edit=Allow only administrators] (indefinite) [Move=Allow only administrators] (indefinite))) |
Revision as of 16:39, 21 September 2021
The easiest place to start in creating a new Deployment Pipeline is with a new project of some kind. However, even if you are not starting from scratch, it is good to start with small steps. Build your pipeline incrementally to support your development.
It is a common mistake to attempt to complete this task as “one giant leap”. Much easier to grow the pipeline incrementally, and to build upon success.
Whatever your starting point, begin the pipeline with a “Walking Skeleton”. The idea is to use a minimal case to get something into place that works, before dealing with the complexities of the more difficult aspects of “Releasability” or with running vast builds or executing massive suites of automated test cases.
Start first with the “low-hanging fruit”.
Begin with a Basic Functioning Pipeline
Your aim in staring out is to get a basic, functioning, deployment pipeline in-place that will work for your teams, with the technologies that they use.
As we have already covered, the goal of a deployment pipeline is to act give you feedback on the ‘Releasability’ of your changes.
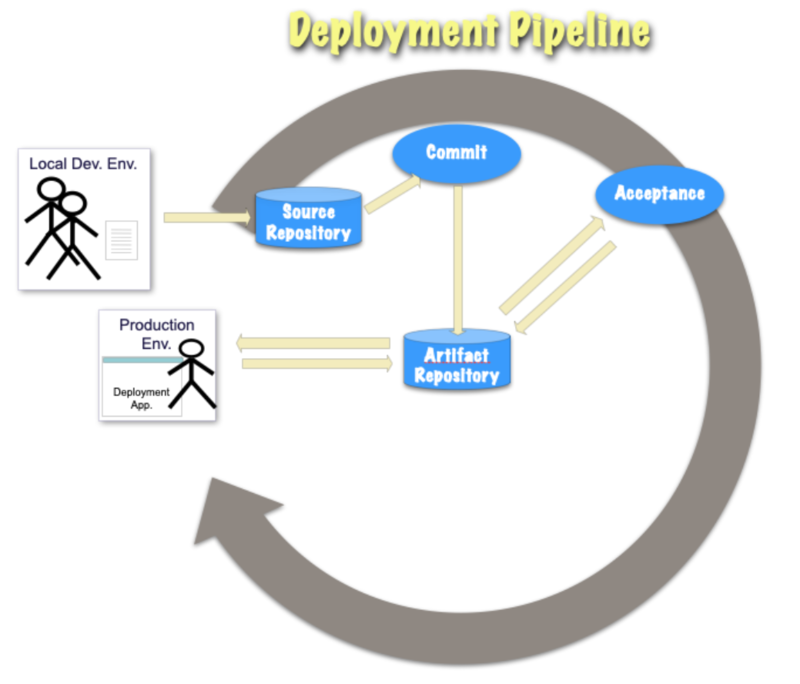
The pipeline in the Figure above is what we consider to be the minimum necessary steps to determine Releasability. Begin the creation of your pipelines by first getting this minimum in-place.
The minimum pipeline has:
- Version Control
- A Commit Stage for fast, developer-entered Feedback
- An Acceptance Stage, to confirm that changes are configured correctly, work as part of the whole system and fulfil user-needs.
- Automation that supports deployment into Production.
To create this basic, functioning pipeline, we will need a some of you code to work with.
